
Getting started with ClipWall
Find it in the menu bar, add your first clip, and build a rotation that plays quietly behind your icons.
ClipWall opens no window and keeps no icon in the Dock while it runs, so the first thing worth learning is where it actually lives. After that it is a few clicks.
1. Look in the menu bar, not the Dock
Open ClipWall the way you open anything else, from Applications, Launchpad, or by typing its name into Spotlight. Nothing obvious happens: no window appears, and no icon lands in the Dock. That is deliberate rather than broken.
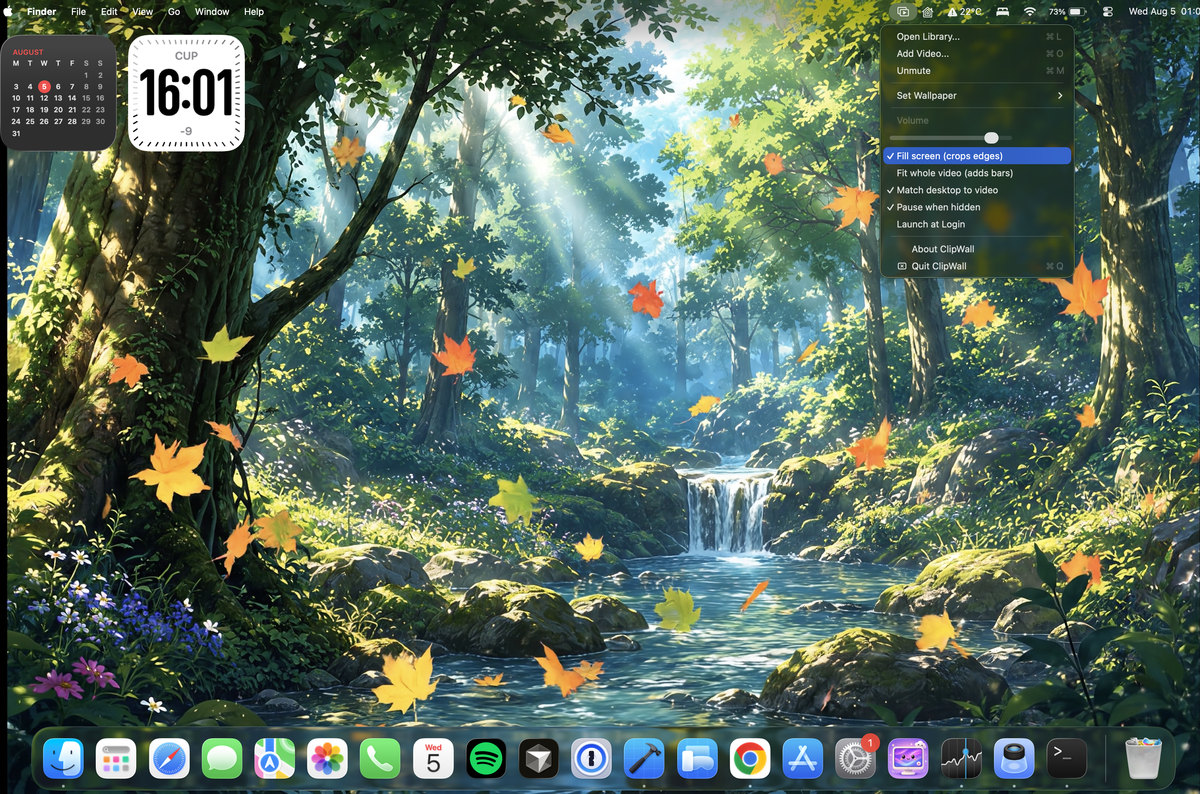
Look along the menu bar at the top of your screen for the ClipWall icon and click it. Everything the app does is in that menu and in the library it opens. The four shortcuts worth knowing sit next to their commands: Command L for the library, Command O to add a video, Command M to mute or unmute, and Command Q to quit.
Quitting is safe at any time. The menu bar icon disappears, your usual desktop picture comes straight back, and your clips and settings are exactly as you left them.
2. Add your first clip
Choose Add Video from the menu, or press Command O. Pick one file or several at once. If QuickTime Player can open it, ClipWall can play it, which in practice covers the MP4 and MOV files you already have. The usual exception is .mkv, which neither can open; converting one to MP4 is quick, and ClipWall says so rather than adding a file it cannot play.
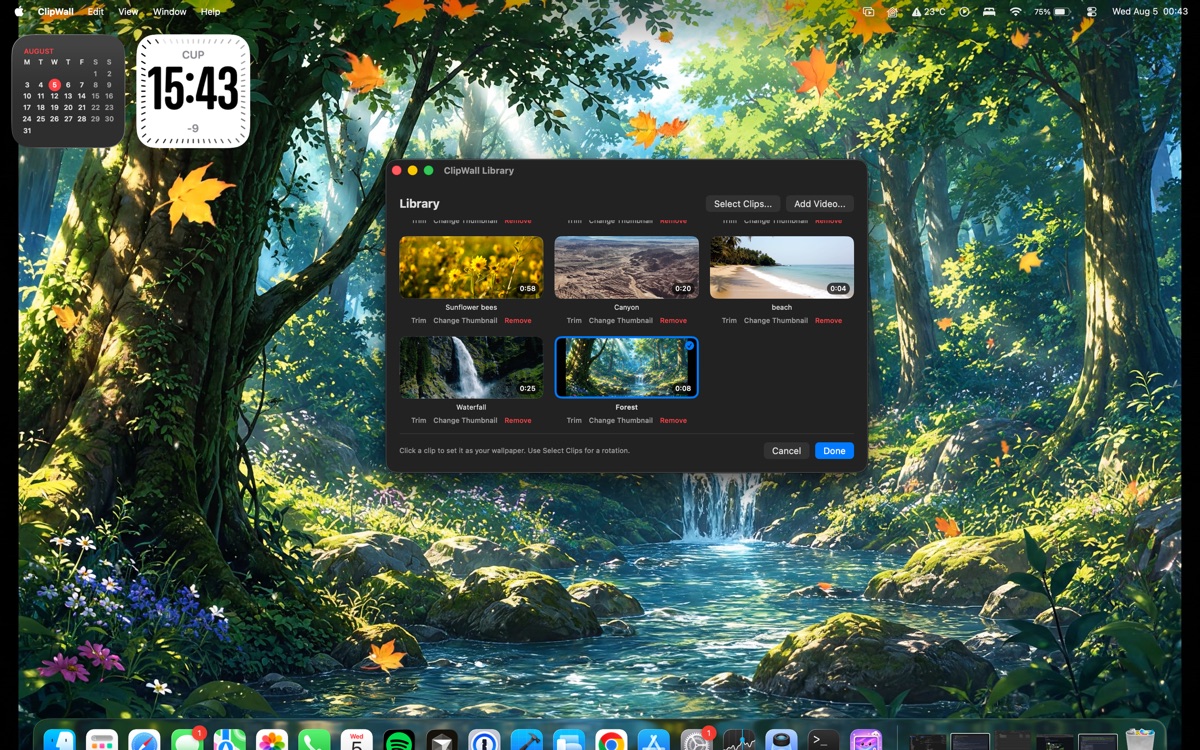
Your clips land in the library, each with a thumbnail and its length. Click one and it becomes your wallpaper straight away, looping behind your icons, with a blue outline in the library to show which one is playing.
The slider at the top of the library makes the window see-through, so you can watch a clip playing behind it while you choose. Drag it left for more transparency, and back to the right when you want to read the library plainly again.
ClipWall plays your video where it already sits. It never moves, copies over, or deletes your original, and macOS only grants it permission to read the file, so it could not change it even if it tried. If a clip stops playing later, the file has usually been moved, renamed, or left on a drive that is not plugged in.
3. Play several clips, in the order you choose
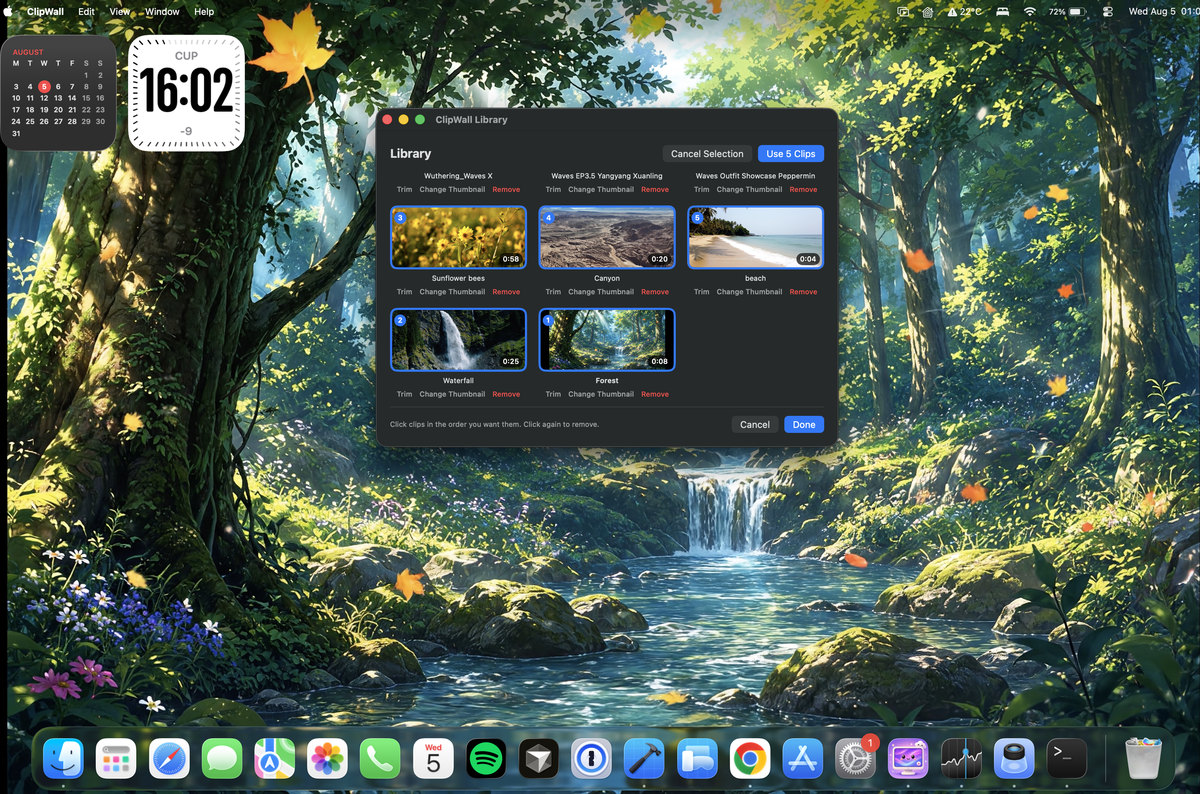
One clip on a loop is fine. A handful is better. Open the library with Command L and click Select Clips.
Now click your clips in the order you want them: each one is numbered as you go, and clicking a numbered clip again takes it back out. The confirm button counts your picks, so it reads Use 5 Clips when you have chosen five.
ClipWall moves through them from there, fading one into the next. Each clip plays all the way to its end before the next one starts, so a scene is never cut off halfway through.
4. Trim a clip down to the part you want
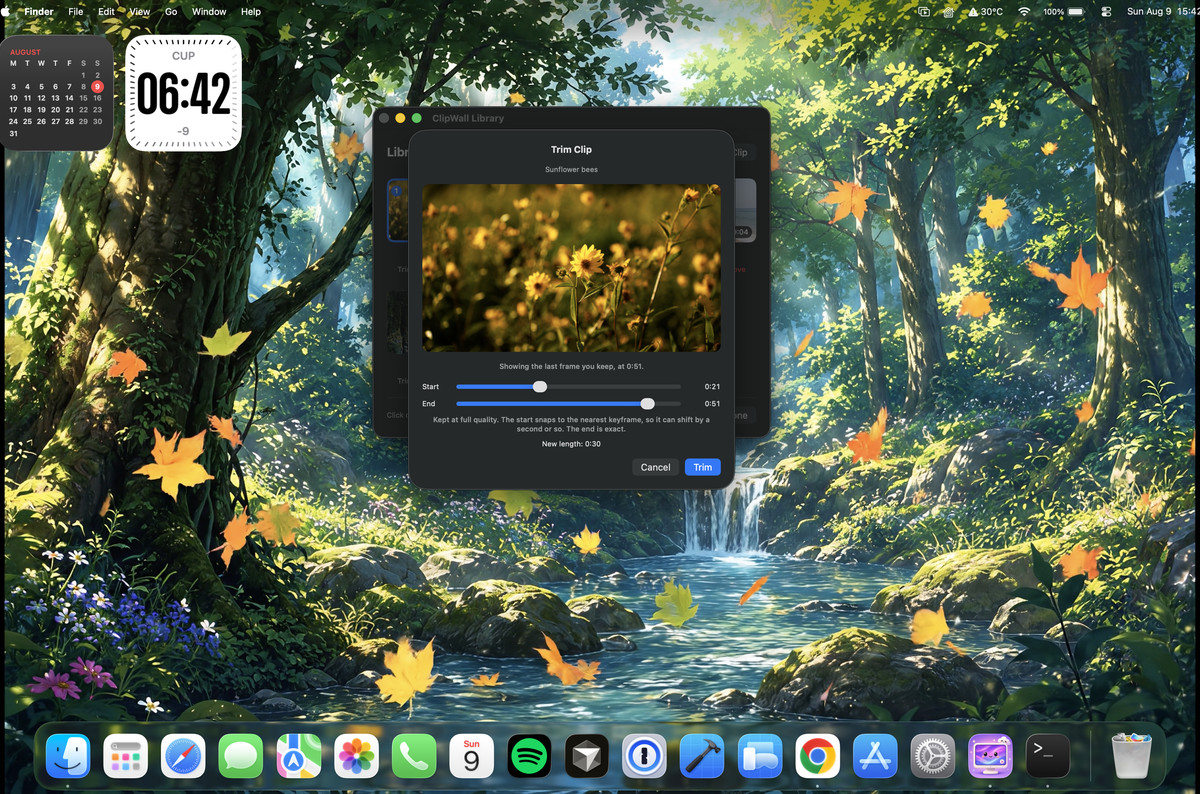
Most videos have a few seconds worth looping and a lot that is not. Click Trim under any clip, then drag Start and End. The preview shows you the exact frame you are keeping, and the new length updates as you drag.
Nothing is re-encoded, so the picture never turns softer or blockier, and the trimmed copy is written into ClipWall’s own storage while your original file stays untouched. The start snaps to the nearest keyframe and can shift by a second or so; the end is exact.
Re-trim as often as you like. Every trim starts again from the original, so the quality never degrades no matter how many times you change your mind.
5. Pick the picture a clip shows
Every clip gets a thumbnail from somewhere near its start, which is not always the moment that says what the clip is. A video that opens on a dark sky and then reveals a beach will sit in your library looking like nothing at all.
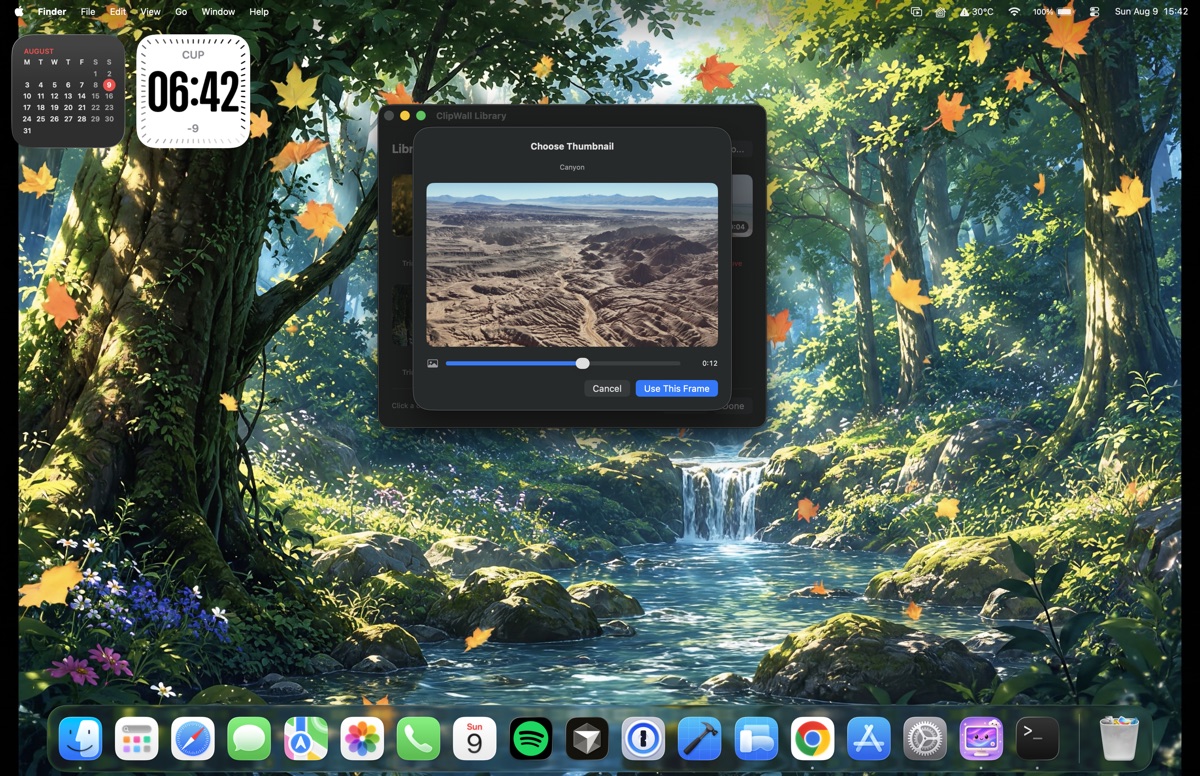
Click Change Thumbnail under the clip, drag along to the frame you want, and click Use This Frame. It changes only the picture shown in the library, never the video or where it starts playing.
The rest of the menu
Everything else is in that first screenshot, and it is worth two minutes.
Fill screen crops the edges so the video covers everything. Fit whole video shows the entire frame and adds bars where the shapes do not match.
Match desktop to video is on by default, and it fixes something odd about macOS. Your Mac decides whether the menu bar is light or dark by looking at the desktop picture, not at what is actually on screen. Since ClipWall draws the video in front of that picture, the menu bar can end up unreadable. This setting keeps the hidden picture in step with your clip so macOS reaches the right conclusion.
Set Wallpaper gives each display its own clip, or runs the same one everywhere.
Launch at Login starts ClipWall with your Mac, so it is already going when you sit down.
Clips start muted. If you want sound, unmute from the same menu and set the level with the volume slider under it.
That is the whole setup. The next guide covers the question people ask first about any moving wallpaper: what it costs your battery, and the moments ClipWall decides to stop playing on its own.