
Getting started with BeachSea
Save your first beach, set which way it faces, and read what the sea is doing before you swim.
BeachSea takes about a minute to set up, and one step in the middle is worth doing properly. This guide walks through it.
1. Add the beach you swim at
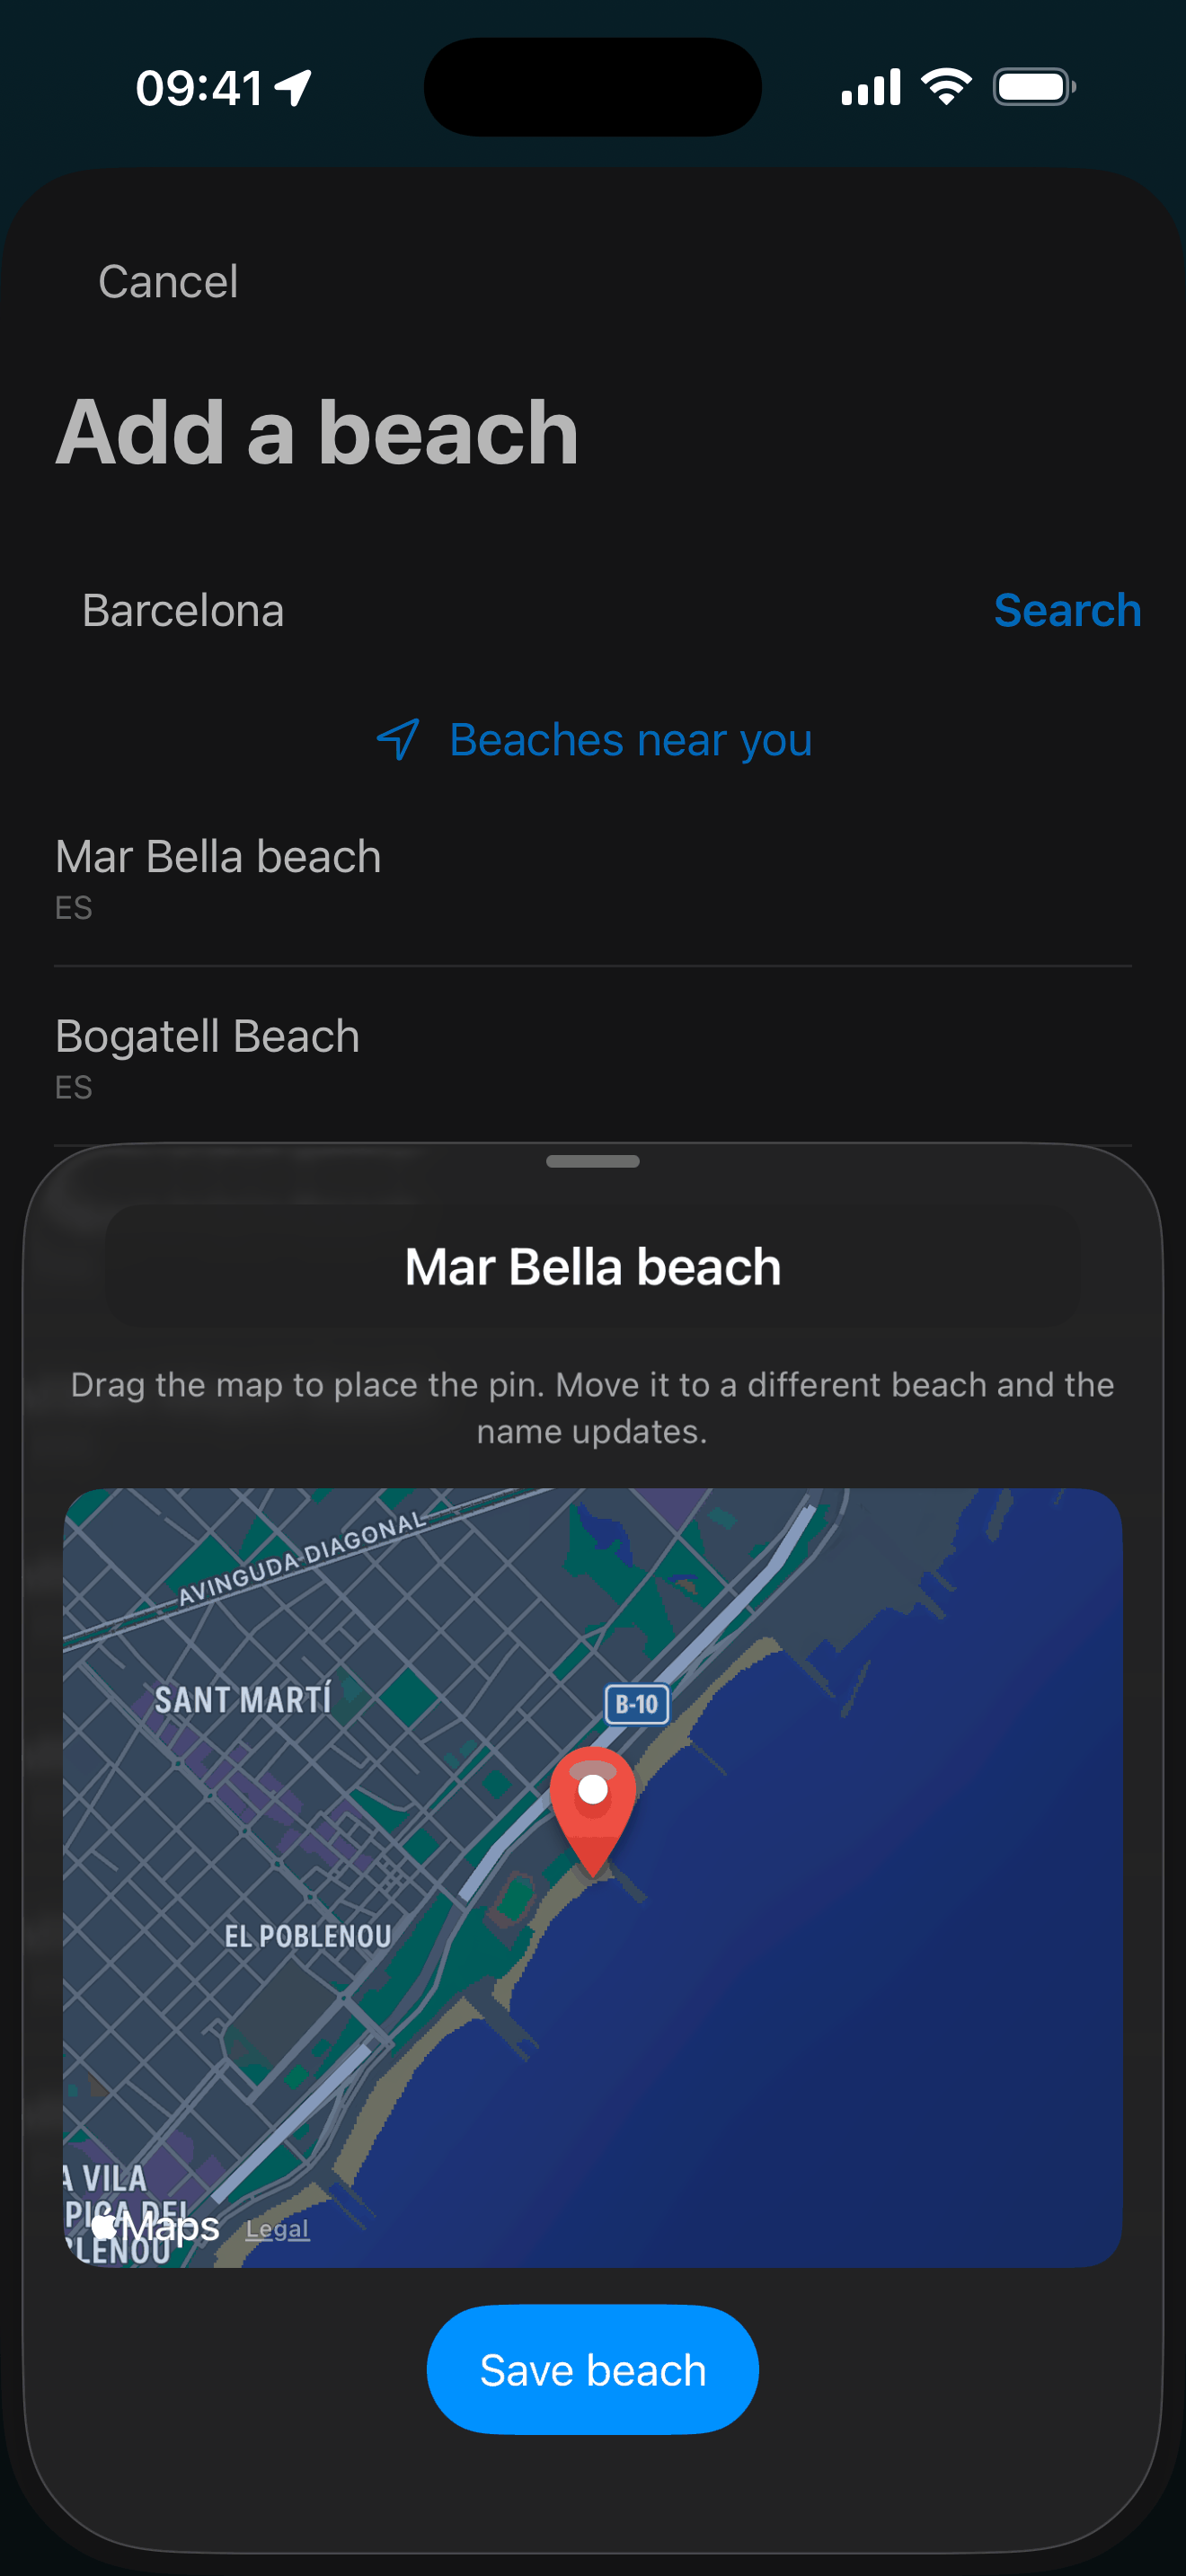
Tap the plus button in the header. Search for a beach by name, or tap “Beaches near you” to see the ones around you. Pick one and a small map opens so you can check the spot.
Location is optional. Turn it down and you can still search by name and get the whole forecast, though the arrow back to shore in step 4 needs it. BeachSea only ever asks while you have it open, and never in the background.
Drag the map to put the pin exactly where you go into the water, then tap Save beach. Those few seconds matter: the pin is the point the forecast is fetched for, and the point the shore compass sends you back to.
2. Tell it which way the beach faces
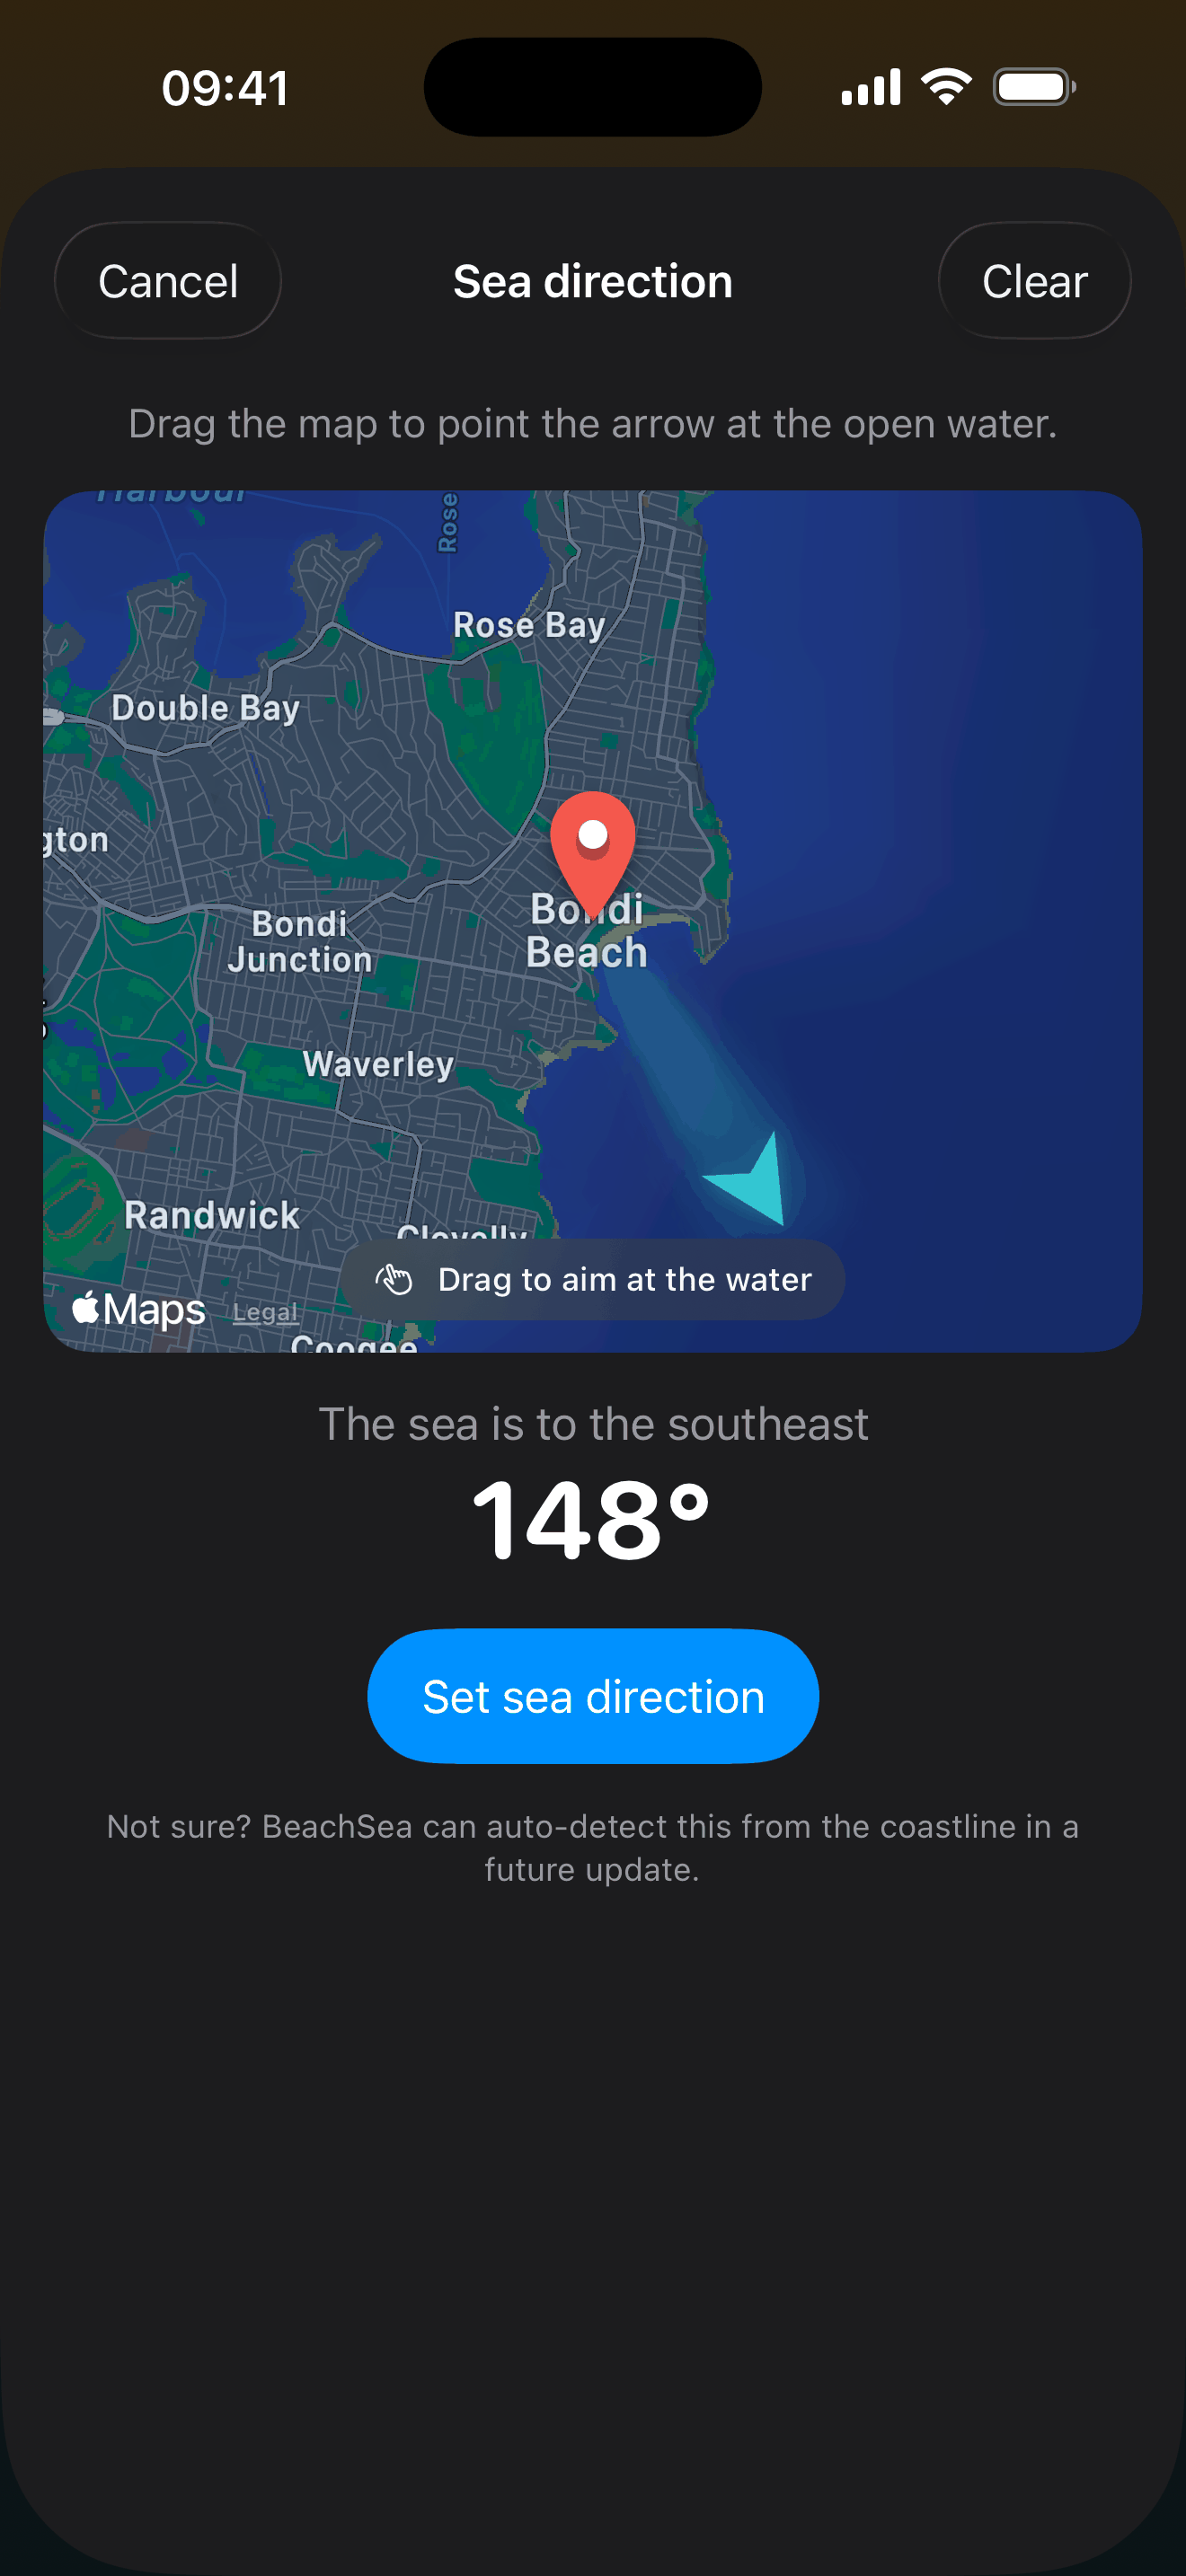
This is the step to not skip. Tap the compass button in the header, drag the map until the arrow points at the open water, and tap Set sea direction. It takes about five seconds, and you only do it once per beach.
BeachSea cannot work this out on its own, and five things stay switched off until you do it: the offshore wind warning, the rip current risk, the arrow in in-the-water mode, the sea direction badge, and the shape of the coastline it draws for your beach.
3. Read what the sea is doing
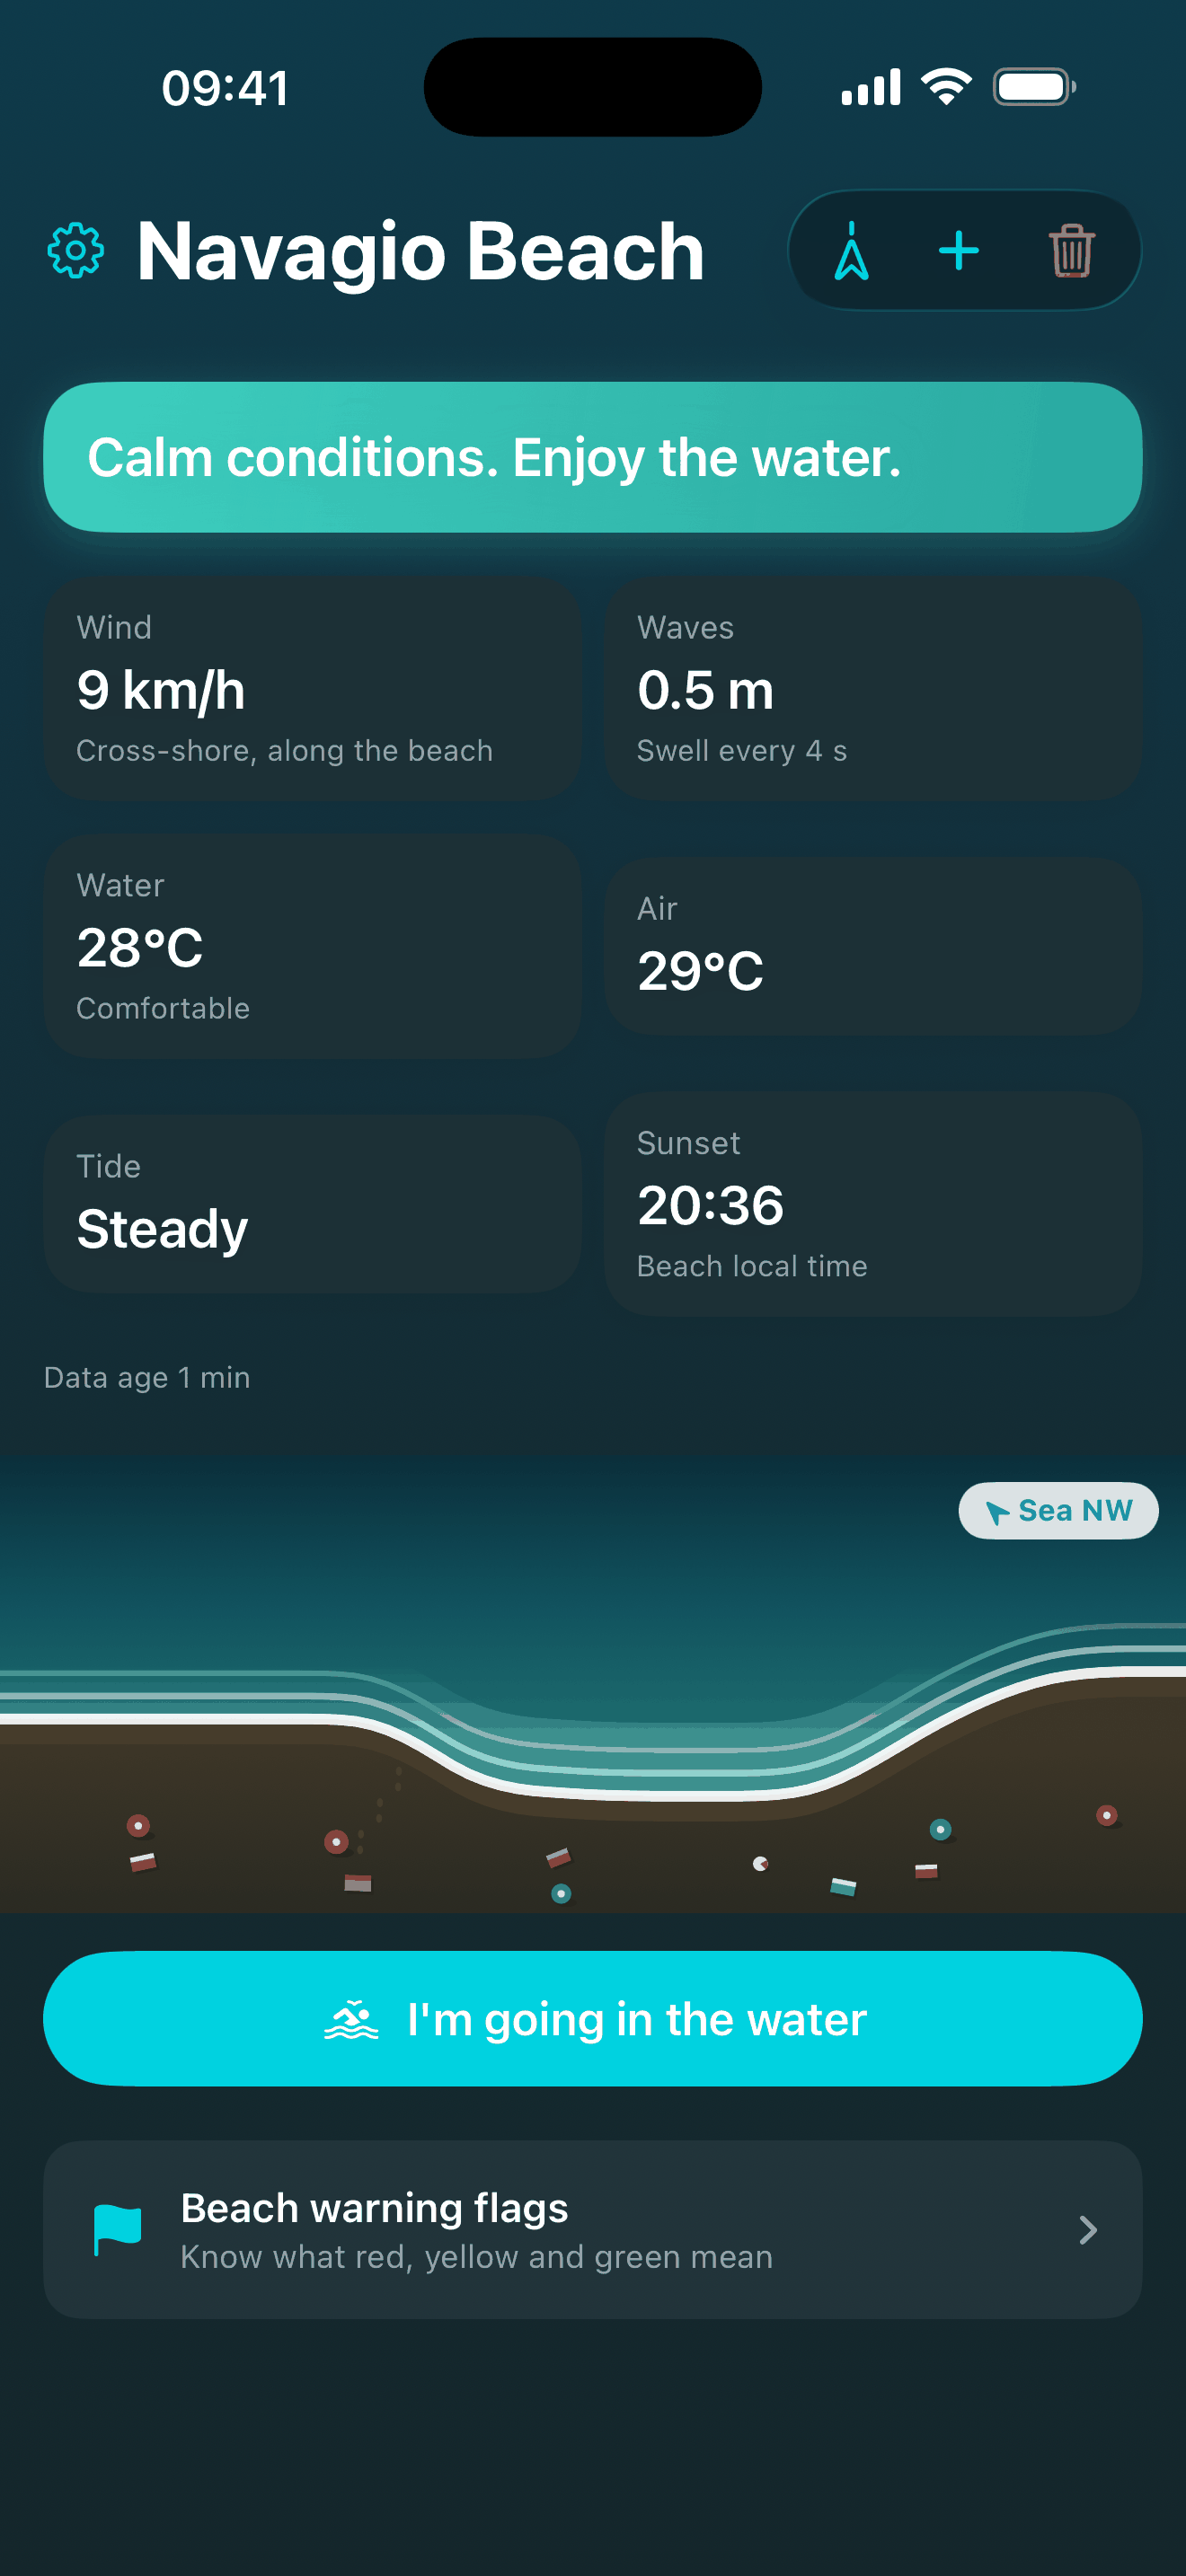
Your beach shows the wind, waves, water and air temperature, the tide trend and sunset, in the beach’s own local time rather than yours. That matters when your beach is in another country.
The line across the top is BeachSea reading those numbers for you. On a good day it says “Calm conditions. Enjoy the water.” and leaves it there. It stays quiet when there is nothing worth saying, so a warning means something.
4. Take the arrow in with you
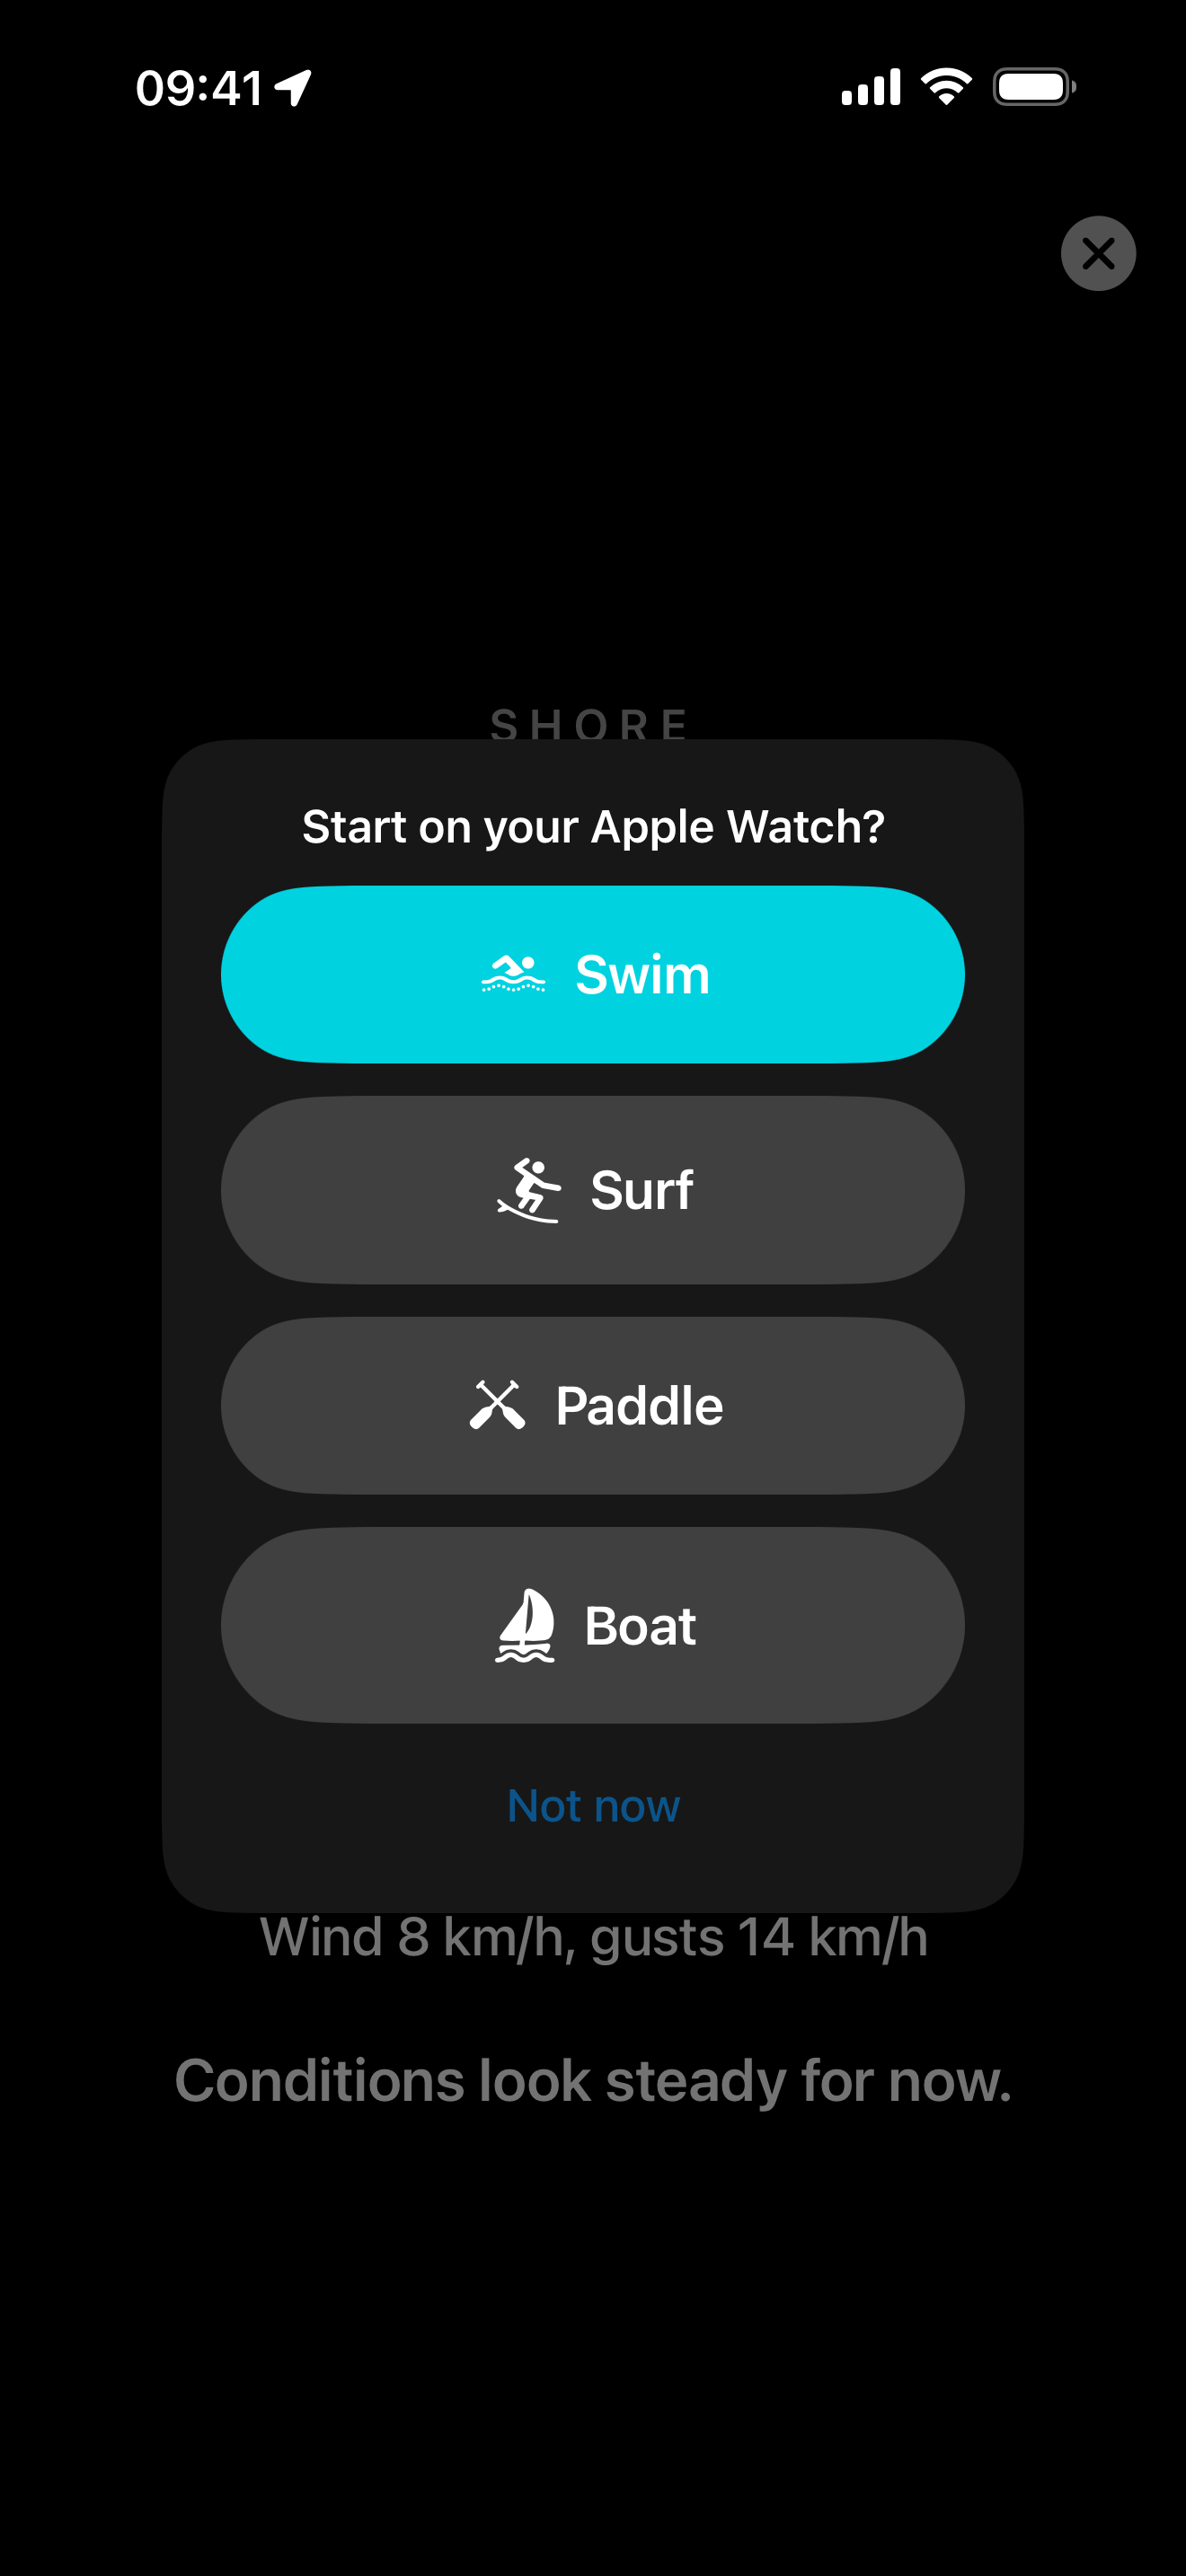
Before you get in, tap “I’m going in the water”. The screen turns black with huge text, stays awake, and shows one arrow pointing back to shore with the distance, plus the wind and a plain word if things are turning. It works from what it has already downloaded, so it needs no signal once it is open.
With an Apple Watch you can send it to your wrist instead. Pick Swim, Surf, Paddle or Boat and the watch runs the session as a workout of that type, saved to Fitness, pointing you home with its own GPS and compass while your phone stays on the sand.
5. Let it tell you when a morning looks rough
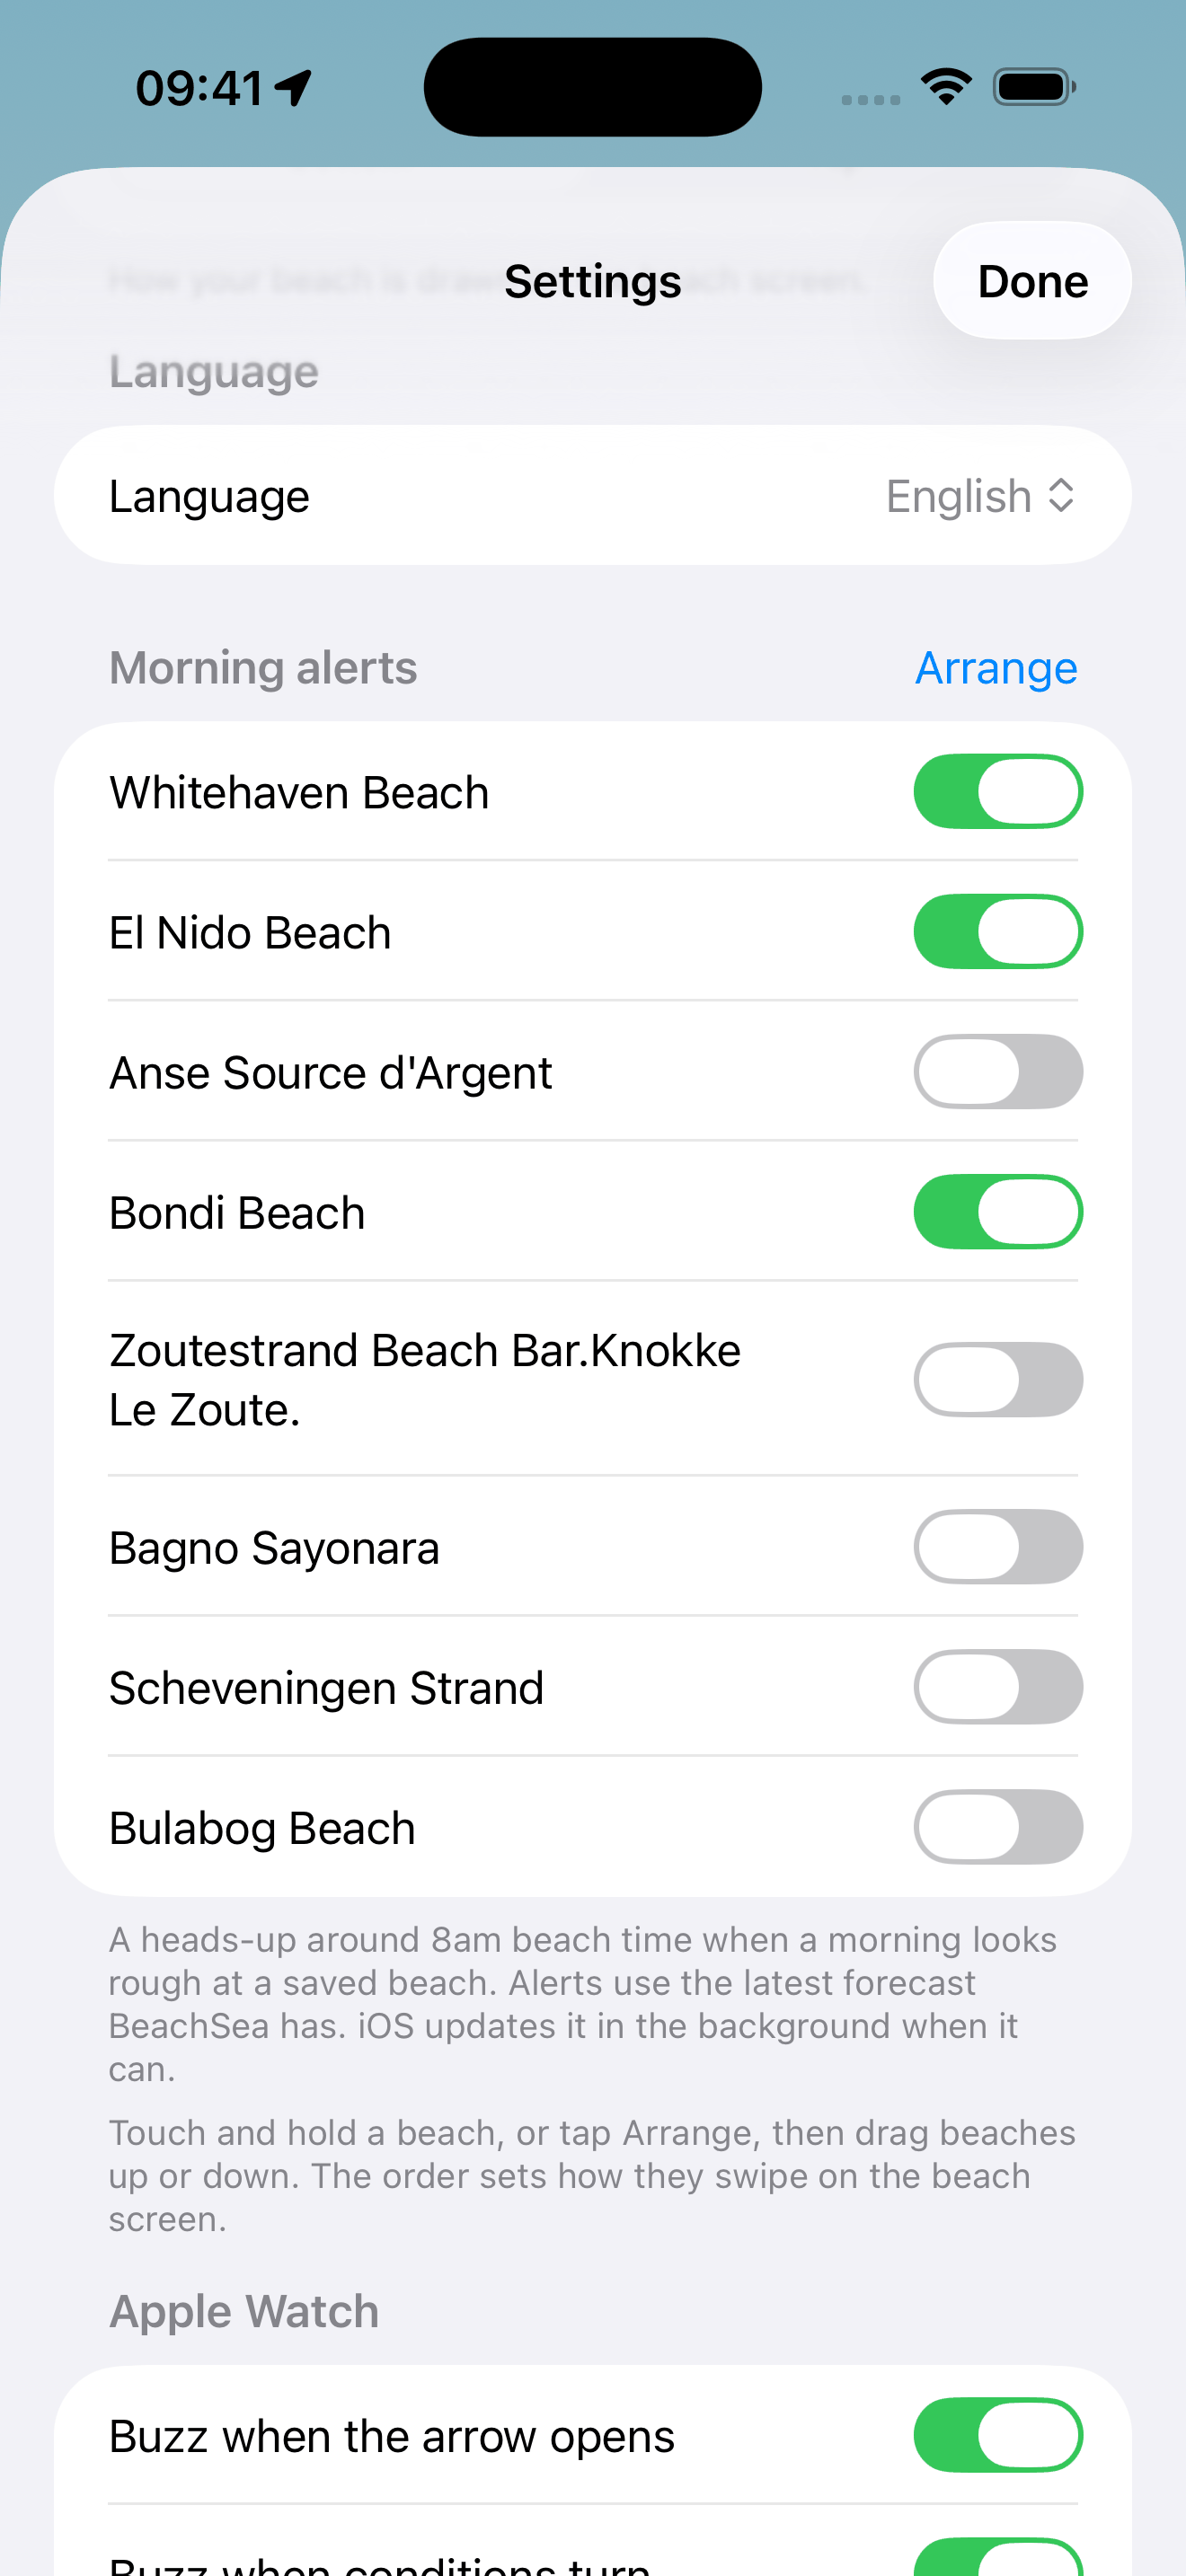
Open Settings and turn on Morning alerts for the beaches you want them for. You get a heads-up around 8am at the beach rather than on your own clock, when the morning is shaping up rough there. Alerts go on the most recent forecast BeachSea has, which iOS refreshes in the background when it gets the chance.
The same list sets the order your beaches swipe through on the main screen. Touch and hold one, or tap Arrange, then drag them where you want them.
That is the whole setup. The next guide covers the warnings themselves, and what each one is actually telling you.
BeachSea is guidance, not a guarantee. Conditions change faster than any forecast and no app can see the water in front of you, so obey the posted flags, swim near lifeguards, and when in doubt, stay out.